


Table of contents

No headings in the article.
In my previous post Setup Selenium Grid using Docker Containers, to set up the selenium grid, we executed four complex commands.
It is difficult to remember all those commands and execute them one by one, to set up the grid every time we need it. Also, it is not a good practice. Docker Compose helps us in this situation. Let's learn what is docker-compose first.
The Docker Compose: To overcome the above problem, Docker has provided us with a tool called Docker Compose. With docker-compose, you can create and run multi-containers at a time with a single command.
Docker Compose is a "YAML" file, in which all the container configurations and application services are specified. It will be named "docker-compose.yml". And with the command docker-compose up all the containers will be up and running.
Each container in the docker-compose runs in isolation, yet can interact with each other in a network.
This avoids remembering the commands and executing commands one by one. And if we want to share this configuration with other team members, we just have to share the docker-compose.yml file with the team.
A step-by-step guide to setup Selenium Grid with Docker Compose:
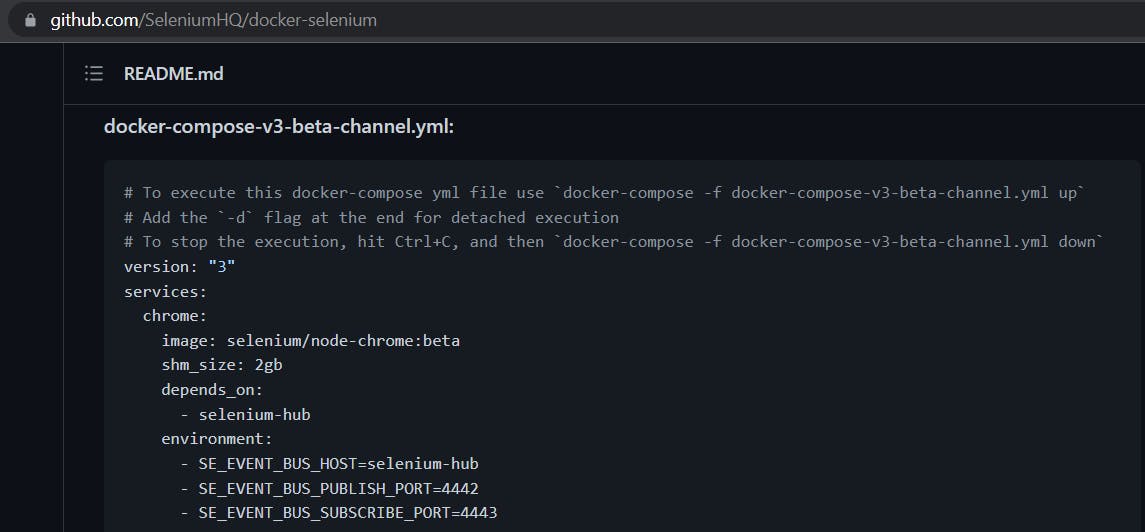
Step 1: Go to selenium's official GitHub account [SeleniumHQ]. (github.com/SeleniumHQ/docker-selenium)
Step 2: Scroll to the docker-compose section and copy the content from the file as shown below.
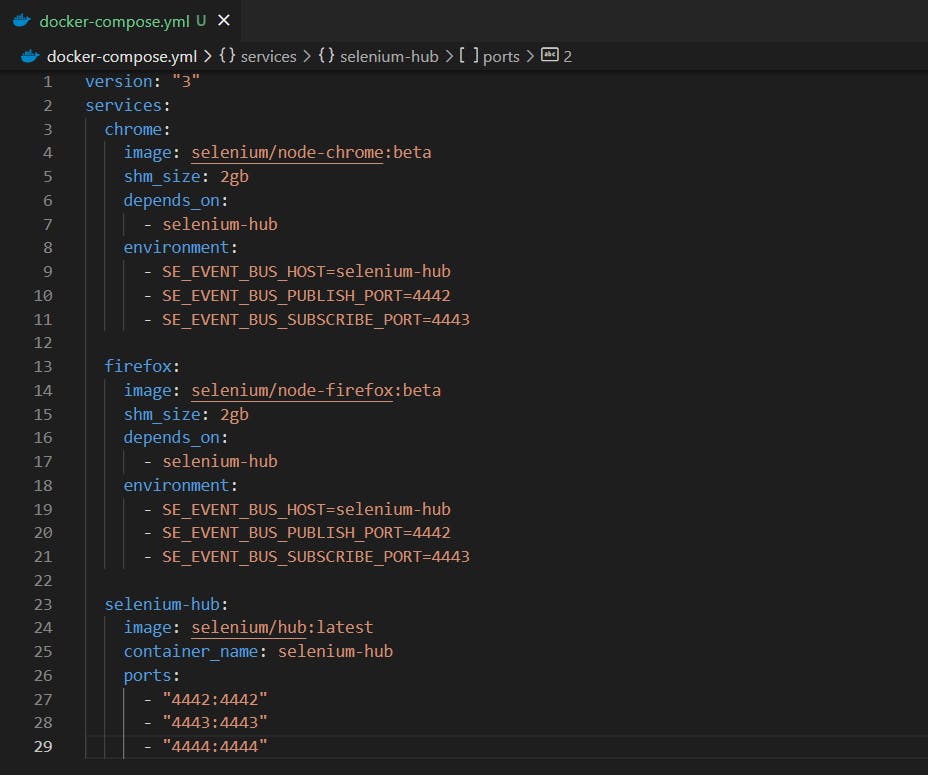
Step 3: Create a text file in the project root directory, and paste the content copied in the above step. Save the file name docker-compose.yml. The file should like to look like this.
Step 4: Open the terminal in the project root directory, where the docker-compose file is present. And run the command below. Docker starts downloading the images and creates the containers.
docker-compose up
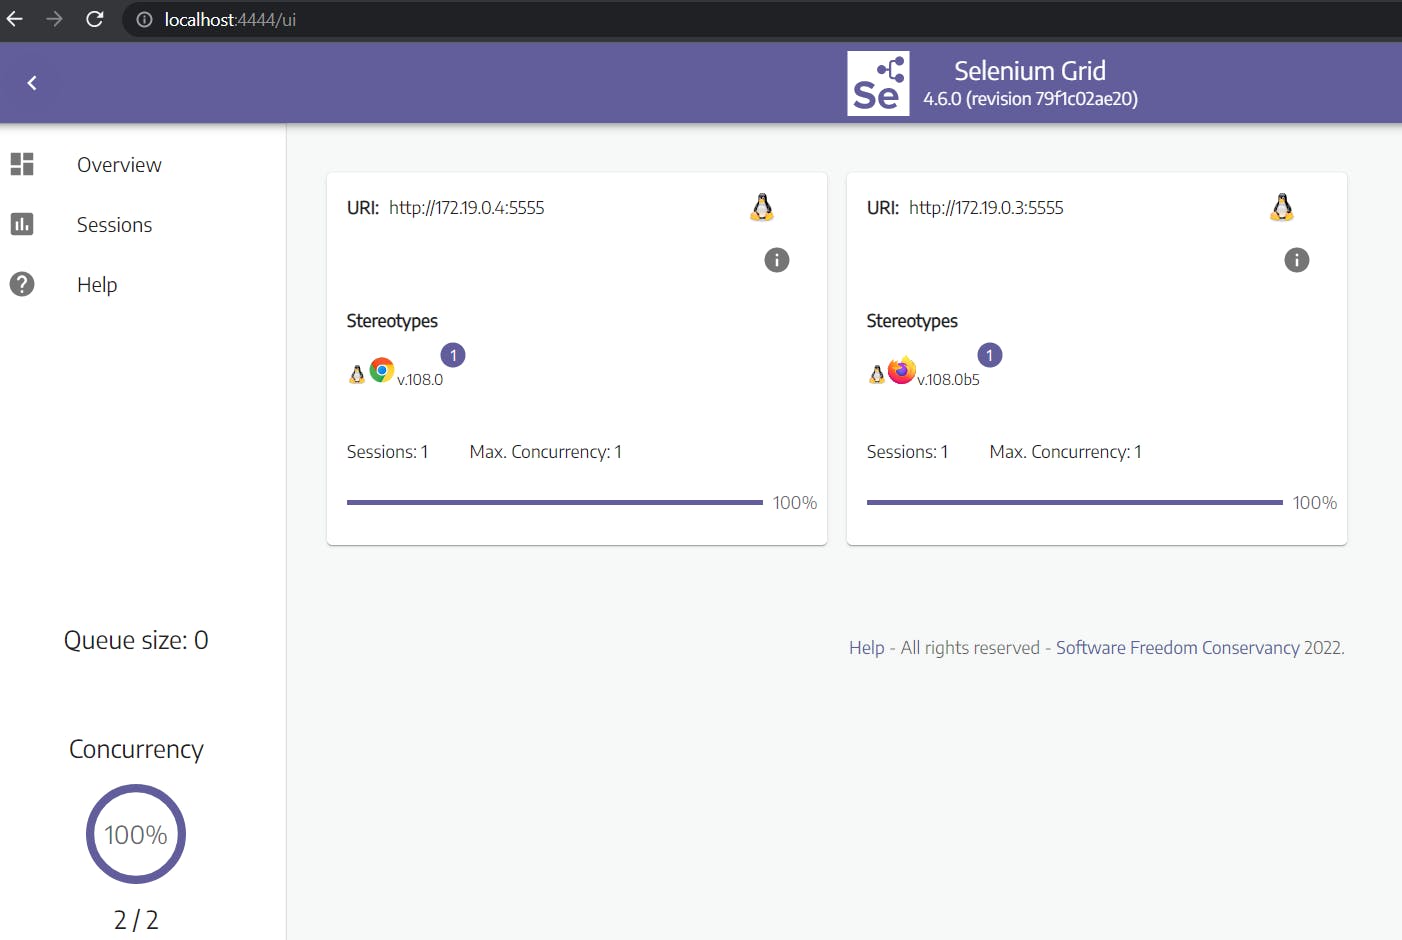
Step 5: A couple of minutes after, open a browser and navigate to the URL localhost:4444. We should see a selenium grid with two nodes as shown below.

Step 6: Open another terminal in the project root directory, to execute the selenium tests. Command.
pytest -s -v -n 2 tests/test_chrome_firefox.py
You can see execution in both sessions.
This is how we can create a selenium grid using docker-compose and execute the selenium tests. You can download the selenium tests that are being used in the above blog post from this GitHub repository.
Thank you for reading. If you have any queries or suggestions feel free to comment. Keep learning. #docker #selenium #dockerwithbrahma